Cash App Payments
Set up Cash App payments in SellApp with email forwarding so digital product orders can process automatically.
Cash App is a P2P payment service that lets users transfer money to one another via a mobile app.
SellApp has integrated Cash App as a payment processor, which means you can accept Cash App payments for your digital products through the SellApp storefront and API. The key setup step is email forwarding, which lets SellApp detect eligible Cash App receipts and process orders automatically.
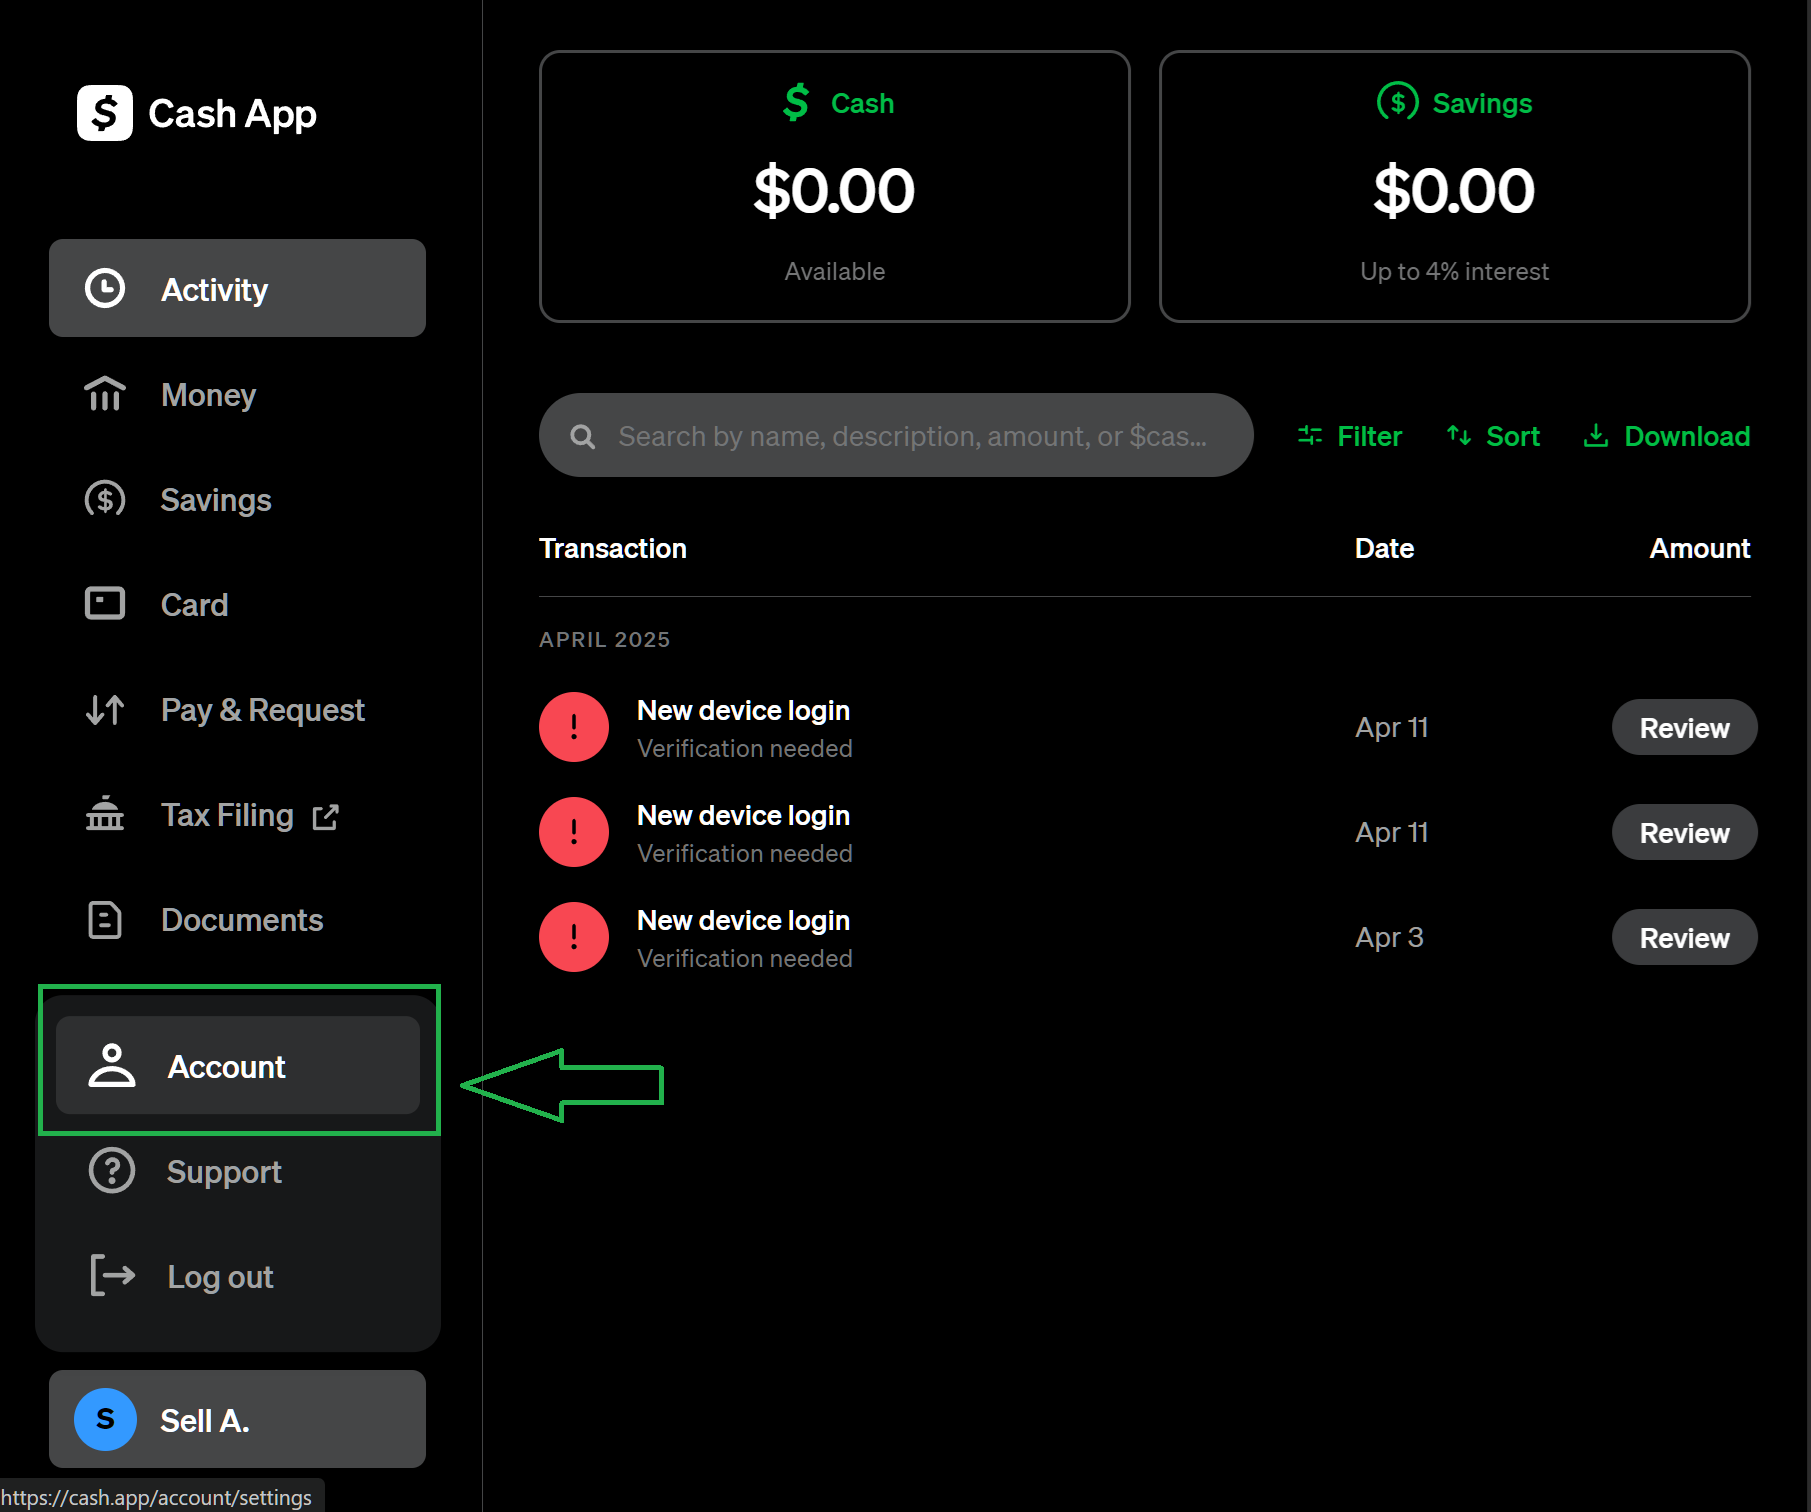
Step 1: Link email
The first step is to add an email address to your Cash App account if you haven't done so already:
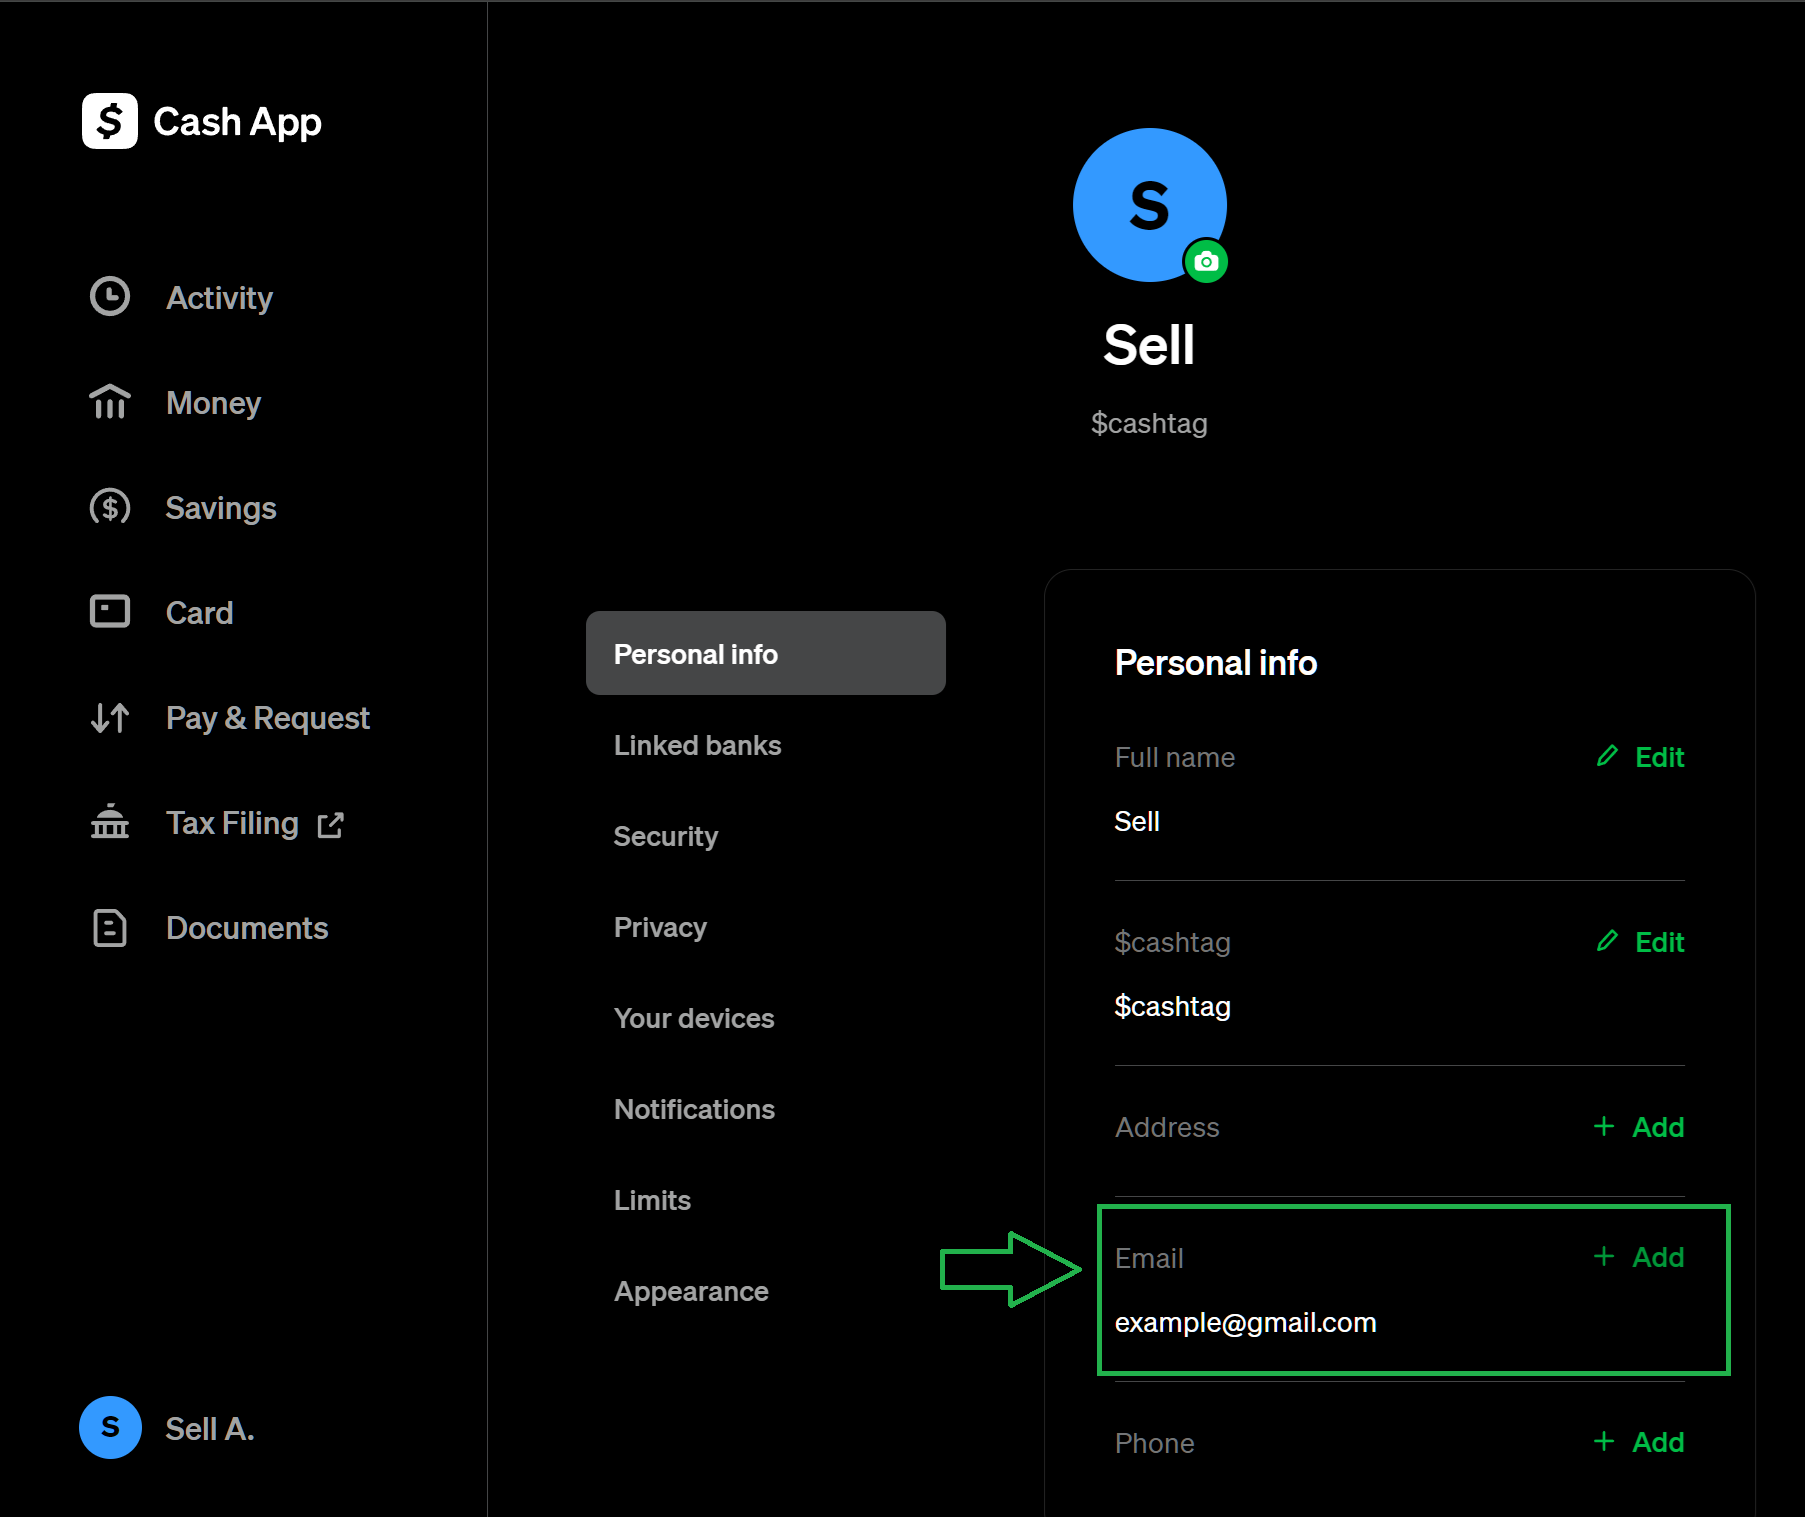
- In the "Personal info" section, you should see your email address
- If it's not there, click the "add" button and follow the steps to enter your personal email address
- Don't forget to verify your email with the code Cash App sends you
Step 2: Forward Cash App emails to SellApp
Important
Here's how to do so with a @gmail.com email address:
- Click here to open your gmail settings.
- Click the "Forwarding and POP/IMAP" tab (the 6th tab at the top)

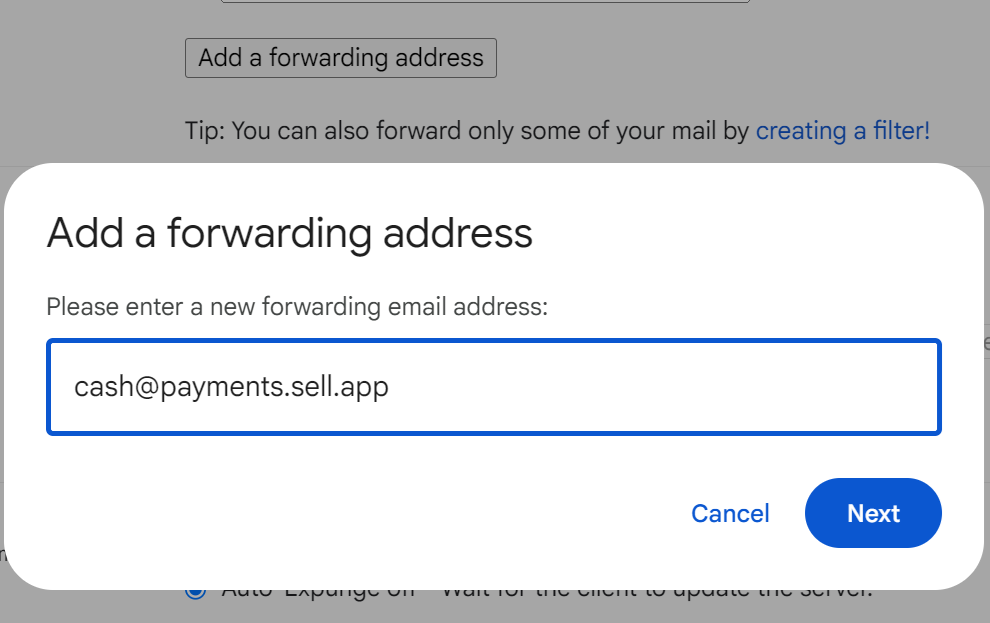
- Click the "Add a forwarding address" button
- In the modal that appears, enter
<cash@payments.sell.app>as the forwarding address
-
Once you click the "Next" button, Gmail will send our systems an email with a confirmation URL. We automatically forward the URL to your email. Visit this URL and you will be good to go.
-
Once verified, we need to create a filter to only forward emails from Cash App to the email we just linked:
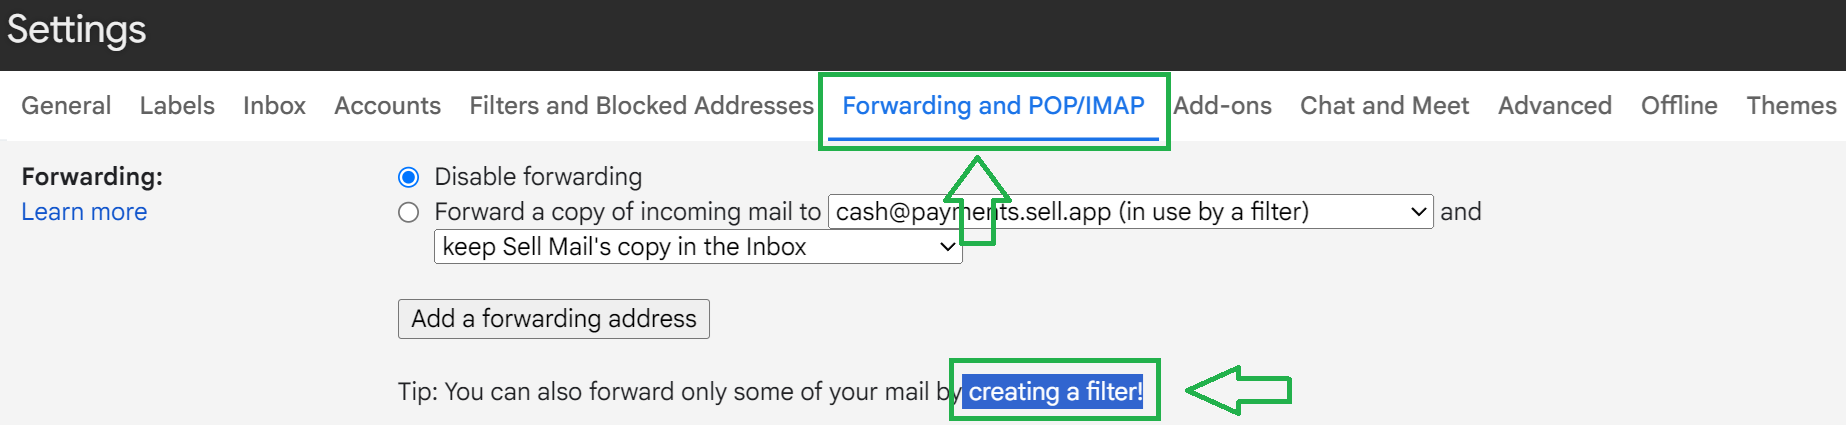
- Click the blue "creating a filter!" text to open the filter modal
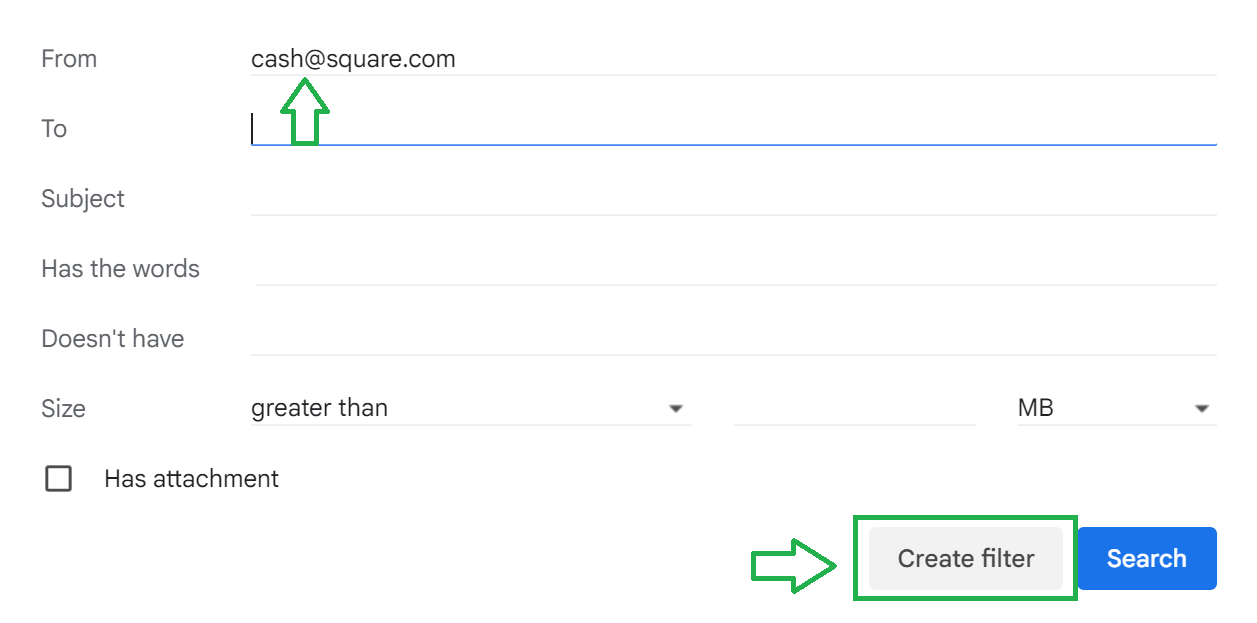
- In the filter modal that pops up, enter
<cash@square.com>in the "From" field, then click the "Create filter" button
- In the next page, select the "Forward it to" option, and select
<cash@payments.sell.app>as the forwarding address
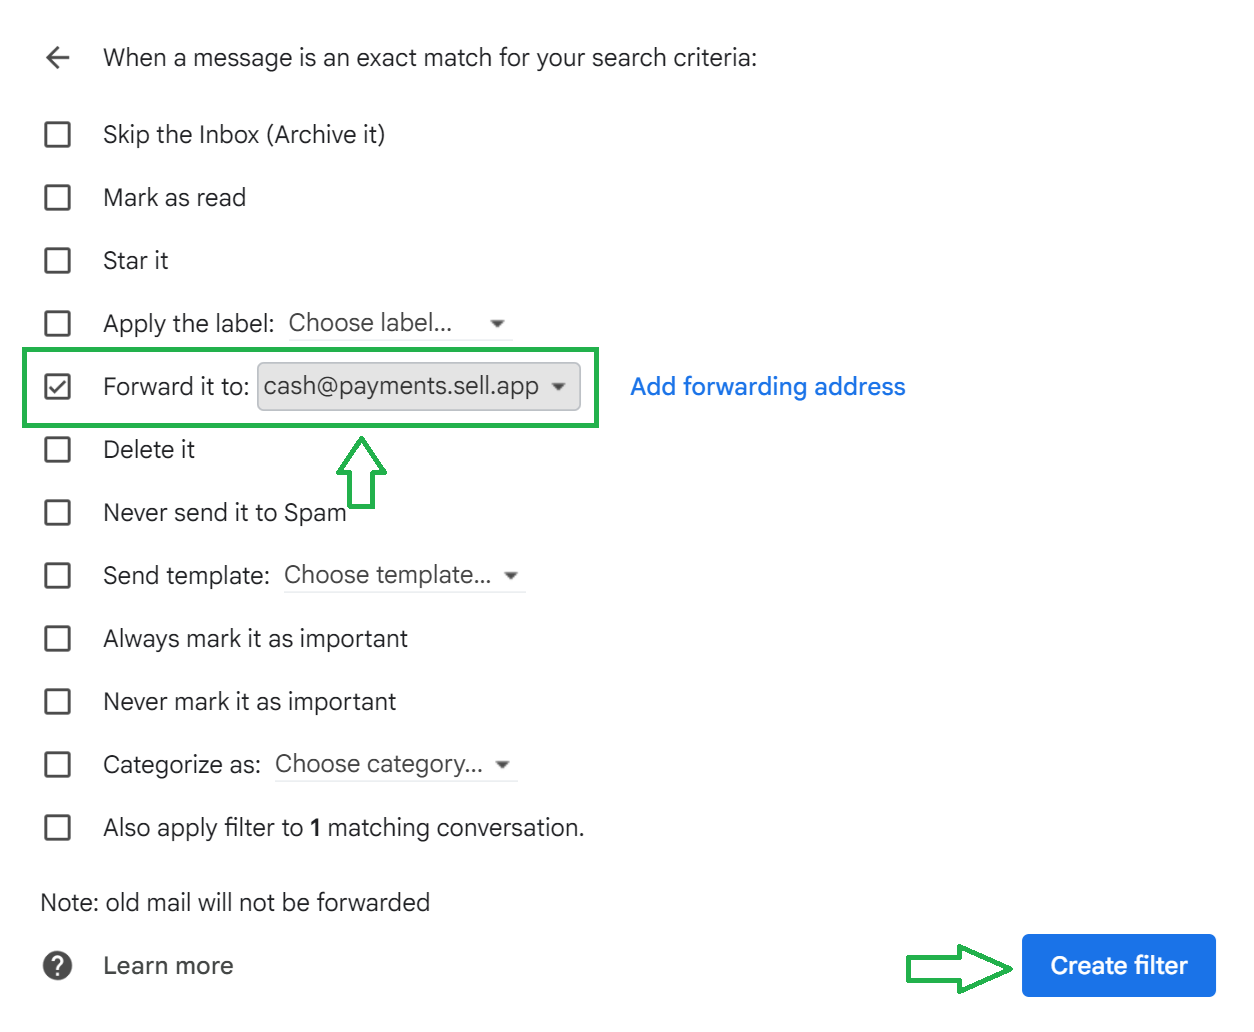
- Finally, click "Create filter"
If your Cash App receipt emails come from an @notifications.cash.app address instead, add that sender to your forwarding filter too. The goal is simple: Cash App receipt emails should forward to SellApp, but the rest of your inbox should not.
Step 3: Link Cash App to SellApp
The final step is to add your Cash App details to your SellApp storefront:
- Navigate to your storefront payment settings by clicking here.
- Click Cash App. In the modal that appears, enter your Cash Tag (including the
$) and the email address you added to your Cash App in step 1. - Follow the forwarding step in the modal, confirm your information, then click "Finish". If all details were entered correctly, you'll now see Cash App as "Active" in the payment settings.
All done. Cash App has been enabled for your store and you can now enable Cash App for every new product you create.
Optionally: Enabling Cash App for products that already exist
If you want to enable Cash App for products that already exist, here's how to do so:
- Navigate to your products dashboard by clicking here.
- On the products page, toggle the checkboxes of the products you want to enable Cash App for.
- Open the "Bulk update" dropdown and click "Payment methods".
- A modal will pop up; check Cash App (& optionally other payment methods you'd like enabled)
- Finally, click "Update All" in the modal to update the products' payment methods.
That's all done for you: all the products you selected will now have Cash App enabled as a payment method, which customers will be able to select when making a purchase.